Pixels to inches: How to resize images without losing quality in Photoshop
Instagram photos look best at 1080 pixels wide. Pinterest images glow A Facebook picture should be at least 1200 pixels wide–1920 if it’s an event photograph. Now, it is ideal to upload your pictures with a resolution of at least 2048 pixels.
Normal image resizing. While you are able to resize your photographs using a variety of fast online tools, we recommend doing it with care and precision so you don’t hurt the quality of your documents. Listed below are our tips for resizing your images without losing any information in the process.
Knowing the vocabulary
First, it is important to understand the conditions that will be Utilised in this article.
Dimension
The size of a photo is fundamentally the dimension of its width and length. Based on what you are utilizing your photograph for, you may have to see this dimension in pixels, inches, or centimeters. There are lots of normal sets of dimensions that you are probably familiar with; for example, your old family photograph albums are most likely filled with standard 4×6 inch prints.
The resolution of a photograph describes how many pixels you will find within those dimensions. (Therefore, the pixel density of the photo) The bigger those pixels, the greater of these you can fit within your measurements and, in most cases, the sharper your image will appear.
Although you may notice them used interchangeably, DPI refers to print resolution (as in, the number of ink dots per inch) while PPI describes screen resolution (or just how many pixels within an inch when your photograph is viewed at 100 percent ).
File Size
Document size describes how much space or memory your photo takes up. The more information there is in an image, the more memory it requires, and the bigger the file size. “Information” can reference pixels, meaning a higher resolution may provide you a bigger file, or it can refer to items like layers if you’re saving in a non-destructive file type.
Aspect ratio is frequently confused with measurement because they’re closely linked. Your dimension, as we just mentioned, clarifies the length and width of your picture in terms of dimensions. Your aspect ratio describes that length and width in terms of–you guessed it–a ratio. Those 4×6 inch family photographs we only talked about have an aspect ratio of 3:2.
Why is bookmarking significant?
Even If you are not going to print your image, your website or online portfolio will likely have requirements for the file size and resolution that a picture must be so as to be uploaded. Depending on where your image will appear, you may want to utilize a particular aspect ratio (a hero image will demand a different aspect ratio than an Instagram post).
If you do not resize to match these needs, then the hosting website may Refuse to upload it entirely, or worse, compress or distort your photo. The process of resizing the dimensions of a photograph and/or altering its resolution and file size to prepare it for the internet is known as picture optimization.
How to resize in Photoshop for beginners
Resizing in Photoshop is a relatively straightforward procedure. Begin with going To Image > Image Size.
Here you will see all that vocab we simply coated. Your file size (Image Below it are your dimensions.
If you want to convert pixels to inches or need to do the reverse and Last is the image resolution, which is measured in PPI or DPI. In theory, you can simply set these numbers however you like and click on”OK.” In practice, it’s not always that simple.
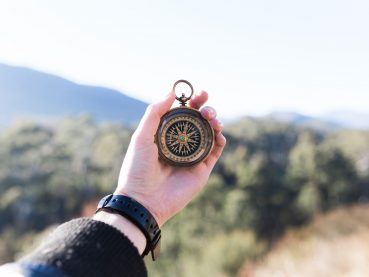
Contributor Kalen Emsley, for Instance. You are able to view the”Image Size” dialogue box we just explained.
The resolution box.
Notice what happens below.
Not only has your resolution increased from the picture over, but your dimensions also have improved as well. You have not actually improved the resolution; you have just expanded out those pixels. Imagine you get a stretchy polka-dot top notch. If you lay it flat, the dots are close together. Should you extend it, those dots get farther apart as the edges of the shirt extend farther out. That’s how it works with resizing and pixels.
Since the resample button has been checked in our Dialogue box (it will generally be this way by default), Photoshop filled in these pixel gaps for us. But since your computer doesn’t have the true scene to compare your image to, it may simply make an educated guess at what the new pixels should appear like. When you resize without resampling, Photoshop won’t fill those openings; it will just change the resolution to match your resizing.
That is how issues like fuzziness occur when you expand what was Originally a brassy photo and because of that, it’s easier to keep good quality when you’re creating a picture smaller than when you are making it bigger. However, whenever you make a picture smaller, you may be inadvertently deleting some of the pixel information, so you might still experience a loss of quality if you attempt to size back up again.
Preserving picture quality
In the event of this particular photograph, the reduction of picture quality would barely be noticeable because it had a healthy number of pixels to start with. You may End up in a situation where you Need to Make changes like this so as to fulfill a upload or printing necessity with a picture, so do two things to maintain image degradation from getting noticeable to the naked eye:
1. Take in a high resolution
This way, you give yourself plenty of information to work together in case you ever have to”fudge” the numbers in your own resolution in post-processing.
2. Keep a copy of your initial
If you ever make a shift and later find that the quality does not hold up the way it seemed to in your editing display, you can go back to the drawing board with your original pixel density.
How to Choose the Best image size
When You’re determining how to size your image, Begin with the Dimensions. The very first step would be to use the right unit of measurement. If you’ll be printing your photo, measure in inches or centimeters. This will be particularly helpful if you want to mat and/or frame it, as you can just opt for a normal size such as 5×7, 8×10, or 11×14 and proceed from there.
Remember that different standard sizes have different aspect ratios. So If your image has an aspect ratio of 3:2 (remember, that is a 4×6 inch photograph ), you will experience some cropping in the event that you resize it to an 8×10, that has an aspect ratio of 5:4.
How to choose the right picture resolution
After your in-camera focus configurations, your settlement is what finally Determines the sharpness of your image. The standard for web-based images is 72 PPI (or DPI, depending on who you speak with about it), although many photographers choose to go with 300, which is the norm for a high-resolution print picture.
Now that you’ve learned what to do in Photoshop to resize your pictures, And the way to do it without sacrificing quality, it is easy to resize your Photography to be used on the internet or in print. Remember to use the proper Of flexibility when you are all set to resize.